
Dog Swimmer's Ear: Vet-Approved Tips to Stop Infections Before They Start
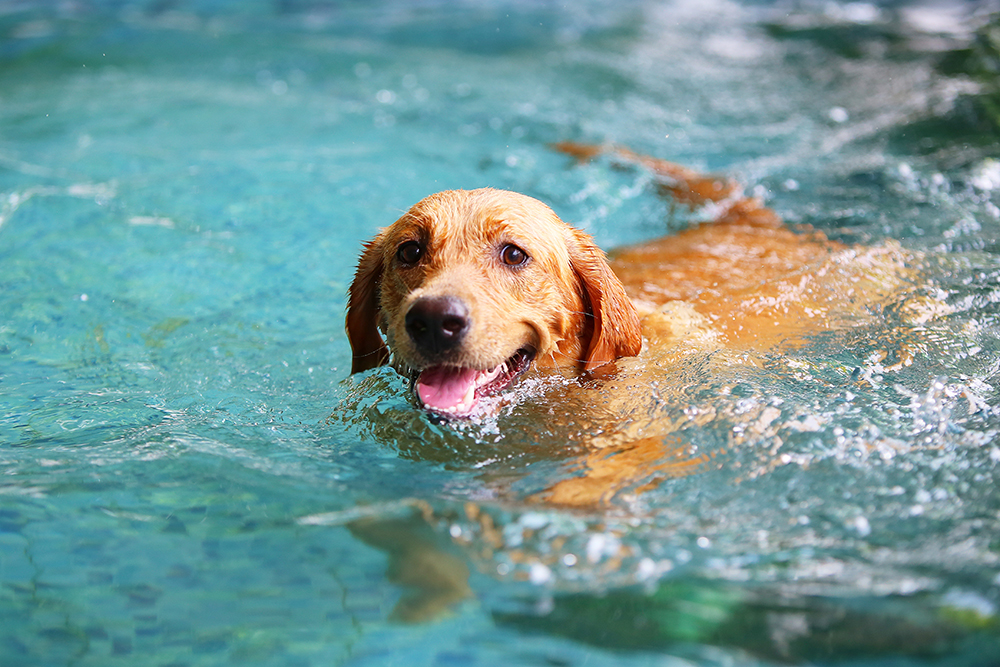
Here's a cold dose of reality I tell every owner in the exam room: that cute head tilt and ear scratching after a swim isn't just your dog being quirky. It could be the start of an ear infection. While some breeds are predisposed, any dog can get swimmer's ear. The good news? With a few simple steps, you can drastically cut the risk.
For Busy Owners: Swimmer's ear in dogs is preventable with proper drying and cleaning. Towel-dry ears thoroughly after swimming. Use a vet-approved drying solution to eliminate trapped moisture and prevent bacterial or yeast overgrowth.
Why Does Swimming Increase the Risk of Dog Ear Infections?
Swimming introduces moisture into the ear canal, creating a breeding ground for bacteria and yeast. This moist environment disrupts the ear's natural defenses, leading to inflammation and infection. Think of it like a petri dish – warm, wet, and perfect for unwanted organisms to thrive. The direct answer? Water degrades the cerumen (ear wax) barrier. The rise in pH favors bacterial and fungal growth, resulting in infection.
From a clinical perspective, the ear canal's anatomy plays a significant role. Dogs have an L-shaped ear canal, which traps moisture more easily than a human's straighter canal. This anatomical quirk, combined with the warm body temperature of a dog, creates an ideal incubator for pathogens. Breeds with floppy ears, like Basset Hounds, are even more prone because their ears further restrict airflow, amplifying the moist environment. In these cases, I often recommend owners consider a groomer that specializes in trimming the excess hair that blocks airflow.
1. Towel-Dry Your Dog's Ears Thoroughly After Swimming
The simplest and most effective way to prevent ear infections is to remove moisture after swimming. Use a soft, absorbent towel to gently dry the inside of your dog's ears. Pay special attention to the folds and crevices where water can accumulate. Don't just swipe at the surface; really get in there and soak up the dampness. This is your first line of defense, and honestly, it's often overlooked.
Home-Care Hack: Keep a designated "ear-drying towel" near the door you use after swimming. This serves as a visual reminder and makes the process more convenient. I even suggest to my clients to train the dog to associate ear-drying with a treat. Positive reinforcement goes a long way!
Red Flag Checklist: If your dog resists having their ears touched or shows signs of pain during drying, stop immediately and consult your veterinarian. This could indicate an existing infection or sensitivity.
2. How to Use a Dog Ear Drying Solution Correctly After Swimming
Towel drying alone may not remove all the moisture from your dog's ear canal. A drying solution helps to further reduce moisture and create an unfavorable environment for bacteria and yeast. Look for solutions specifically formulated for canine ears, containing ingredients like isopropyl alcohol or boric acid. These ingredients help to evaporate moisture and acidify the ear canal, inhibiting microbial growth.
The Clinical Perspective: Drying solutions work by altering the pH and osmotic environment within the ear canal. Isopropyl alcohol acts as a drying agent, while boric acid helps to maintain a slightly acidic pH, which is less hospitable to many common ear pathogens. However, use these products judiciously, as overuse can lead to irritation and dryness.
Home-Care Hack: Warm the drying solution slightly before application by holding the bottle in your hands for a few minutes. This makes the process more comfortable for your dog. After applying the solution, gently massage the base of the ear to help distribute the liquid throughout the canal. Vet-speak translation? Gently massage the pinna (ear flap) to facilitate distribution.
Red Flag Checklist: Never use drying solutions on ears with open wounds, sores, or suspected ruptured eardrums. If you notice any signs of irritation after using a drying solution, discontinue use and consult your veterinarian.
3. Why Regular Dog Ear Checks Help Prevent Infections
Regular ear checks allow you to identify potential problems early, before they escalate into full-blown infections. Look for signs of redness, swelling, discharge, or odor. Healthy ears should be clean, dry, and free of debris. The biological 'why'? Cerumen accumulation leads to localized inflammation. This then triggers the complement cascade and neutrophil chemotaxis. The end result is swelling and redness from increased vascular permeability.
The Clinical Perspective: Early detection is mission-critical. The longer an infection goes untreated, the more difficult it becomes to eradicate. Chronic ear infections can lead to thickening of the ear canal walls, making them even more prone to future infections. In severe cases, surgery may be required to open up the ear canal and improve drainage.
Home-Care Hack: Make ear checks a part of your regular grooming routine. This will help your dog become accustomed to having their ears handled and make it easier to spot any changes. Use an otoscope (available online) to get a better view of the ear canal, but be careful not to insert it too deeply.
Red Flag Checklist: Any signs of pain, head tilting, or loss of balance warrant immediate veterinary attention. These could indicate a more serious inner ear infection.
4. Recognize the Early Warning Signs of Dog Ear Problems
Knowing the signs of an ear infection is crucial for prompt treatment. Common symptoms include excessive scratching, head shaking, rubbing the ears on furniture, a foul odor emanating from the ears, and visible discharge. The root cause? Inflammation of the vertical ear canal causes pruritus. This leads to scratching, creating a vicious cycle of inflammation and self-trauma.
The Clinical Perspective: Don't dismiss subtle changes in your dog's behavior. Even mild head shaking or increased ear scratching can be early indicators of a problem. The sooner you address the issue, the less likely it is to progress into a severe infection.
Home-Care Hack: Keep a log of your dog's ear health. Note any changes in appearance, odor, or behavior. This information can be valuable for your veterinarian in diagnosing and treating ear problems.
Red Flag Checklist: If your dog exhibits any neurological signs, such as circling, stumbling, or nystagmus (rapid eye movements), seek immediate veterinary care. These could indicate a serious inner ear infection that has spread to the brain.
5. Why Regular Dog Ear Cleaning Appointments are Non-Negotiable
Professional ear cleanings can help remove built-up wax and debris that can contribute to ear infections. Your veterinarian can also identify early signs of infection and recommend appropriate treatment. A groomer can also help, but they are not qualified to diagnose infections. What I tell my own clients is to think of it like dental cleanings - prevention is cheaper than treatment. The underlying mechanism? Regular cleaning removes substrates for bacterial proliferation. Routine flushing with dilute antiseptic solutions promotes epithelial turnover and reduces inflammation.
The Clinical Perspective: Regular ear cleanings are especially important for dogs with a history of ear infections or those with anatomical predispositions, such as floppy ears or narrow ear canals. Your veterinarian can recommend the appropriate cleaning frequency and techniques for your dog's individual needs.
Home-Care Hack: Learn how to properly clean your dog's ears at home between professional cleanings. Your veterinarian can demonstrate the correct technique and recommend appropriate cleaning solutions. I tell my clients to avoid cotton swabs, as they can push debris further into the ear canal.
Red Flag Checklist: Never attempt to clean your dog's ears if they are painful or inflamed. This could cause further irritation and damage.
6. Cotton Balls: A Simple Solution to Dog Ear Moisture Control
Cotton balls can be used to absorb excess moisture from the outer ear canal after swimming. Gently insert a cotton ball into the ear and allow it to soak up any water. Be careful not to push the cotton ball too far into the ear canal. Why does it work? Cotton wicks moisture by capillary action, reducing the micro-environmental humidity in the ear canal.
Home-Care Hack: Use a fresh cotton ball for each ear to prevent cross-contamination. You can also dampen the cotton ball with a mild ear-cleaning solution before inserting it into the ear.
7. The Importance of Trimming Hair Around Your Dog's Ears
Trimming the hair around your dog's ears improves airflow and reduces moisture retention. This is especially important for breeds with long or thick hair around their ears. A lack of airflow promotes a warm, humid microclimate. This then disrupts the microbiome, favoring pathogenic bacteria and yeast. The result? An increased risk of infection.
Home-Care Hack: Use blunt-nosed scissors to trim the hair around your dog's ears. Be careful not to cut the skin. If you're not comfortable trimming the hair yourself, ask your veterinarian or groomer to do it for you.
8. Be Mindful of the Water Quality Your Dog Swims In
Avoid allowing your dog to swim in stagnant or contaminated water. These sources may contain harmful bacteria or parasites that can cause ear infections or other health problems. Giardia, for example, thrives in stagnant water. In addition to ear infections, contaminated water can lead to gastrointestinal upset and skin infections. This is due to the increased microbial load and the presence of toxins in the water.
Home-Care Hack: Choose swimming locations with clean, clear water. Avoid ponds, ditches, or other bodies of water that may be contaminated.
9. When Should You Discuss Recurring Dog Ear Infections With Your Vet?
If your dog experiences frequent ear infections, it's important to consult with your veterinarian to determine the underlying cause. Allergies, anatomical abnormalities, or underlying medical conditions can all contribute to recurrent ear infections. Food allergies cause chronic inflammation, weakening the ear's defenses. Anatomical issues like stenotic ear canals trap moisture and debris. Systemic diseases like hypothyroidism can impair immune function, increasing susceptibility to infections.
Home-Care Hack: Keep a detailed record of your dog's ear infections, including the date of onset, symptoms, and treatment. This information can be helpful for your veterinarian in diagnosing and treating the problem.
10. When Should You Postpone a Trip to the Lake for Your Dog?
If your dog's ears are already red, inflamed, or infected, it's best to avoid swimming until the condition has resolved. Swimming can further irritate the ears and worsen the infection. Open wounds are a direct route for pathogens to enter. The constant exposure to moisture hinders the healing process. The mechanical action of swimming can further damage the inflamed tissues.
When is it Time to See the Vet About Your Dog's Ear?
While prevention is key, sometimes ear infections are unavoidable. If you suspect your dog has an ear infection, it's mission-critical to seek veterinary care. Your veterinarian can diagnose the infection, prescribe appropriate medication, and rule out any underlying medical conditions.
Red Flag Checklist: Err on the side of caution. If you are unsure, seek veterinary advice. Untreated ear infections can lead to chronic pain, hearing loss, and other serious complications.